Restoration Highlight: Reviving a Historic Log Cabin in Saguache, Colorado

Products used to restore the cabin
Nestled just below the mountains outside of the Great Sand Dunes in south-central Colorado lies the quaint town of Saguache. Derived from the Ute language, Saguache means “blue-green Earth,” a fitting name for a region steeped in natural beauty and history. Located at the northern entrance to the San Luis Valley, known for its hot springs and serene landscapes, Saguache became the site of a remarkable log cabin restoration project. Unfortunately, it sat abandoned for many years before the builders’ grandchildren decided to give it a new life for the next generation.
The cabin we restored was a two-story masterpiece, initially built in the 1900s. Once considered state-of-the-art, this home had been left unoccupied for decades. When its doors were finally opened, it was as if time had stopped in the 1960s—everything was intact, covered in a thick layer of dust but preserved in near-mint condition. It was a beautiful revolutionary home of its time with unique appliances not typically found in homes of that time. Even the original mesh wire and mortar/cement chinking spoke of the craftsmanship and care that had gone into its creation nearly a century ago.
First Challenge of this Project: Scheduling
When the client first contacted us in late August, hoping to get on the schedule as soon as possible, we had to consider many factors, which you can learn more about in our article What We Consider in a Log Home Restoration Estimate! The primary one was whether or not we could fit it into our schedule before the winter season in Colorado closed for 2022. Log Masters Restorations’ schedule is often filled out 9 months to one year in advance. But we had three new employees starting and thought this could be an excellent opportunity to break them in since this cabin had many challenges and necessary wisdom and skills for them to gain experience through on-the-job training. And did they get broken in by more than just the project but also the brutal Colorado fall weather and early snow?
So, that late summer, we traveled to the house for an in-person estimate to better understand the cabin’s restoration needs and the client’s desires.
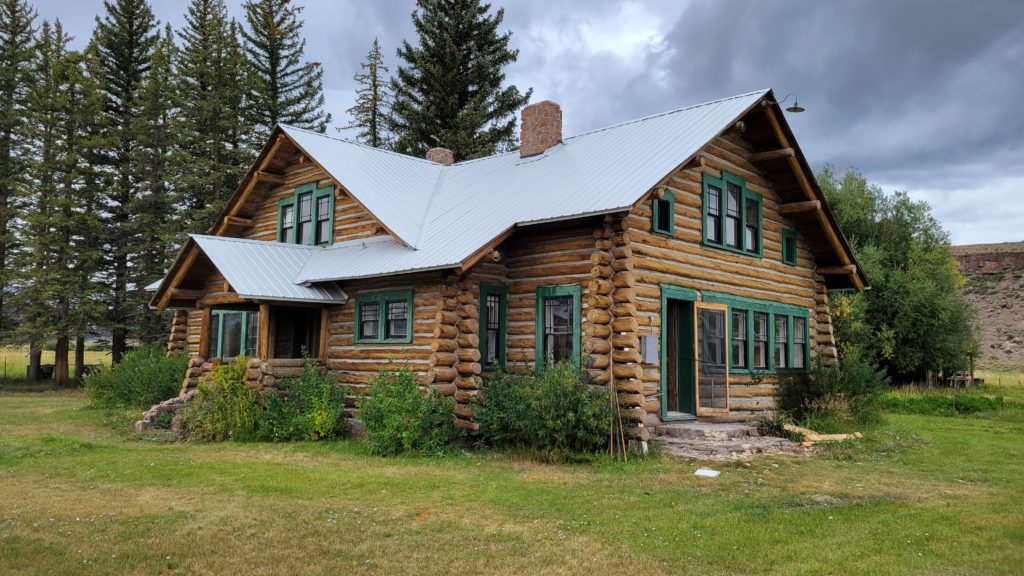
Before Restoration at the Time of In-Person Estimate. Note: Too much shrubbery near a log cabin will often lead to rotted logs it touches.

After restoration during our clean-up- We finished in early spring, as evidenced by the trace of snow on the ground.
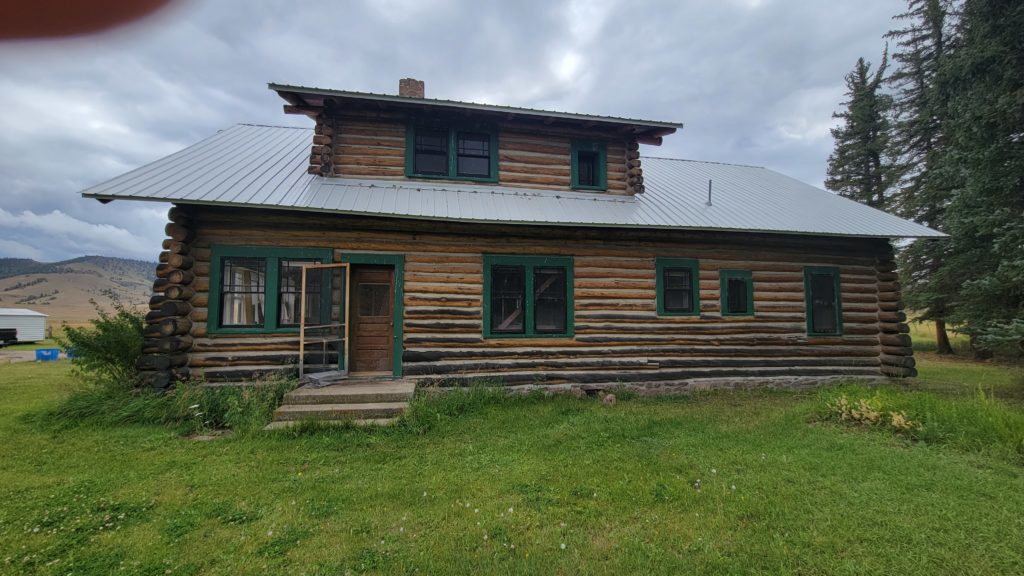
The backside of the cabin before restoration
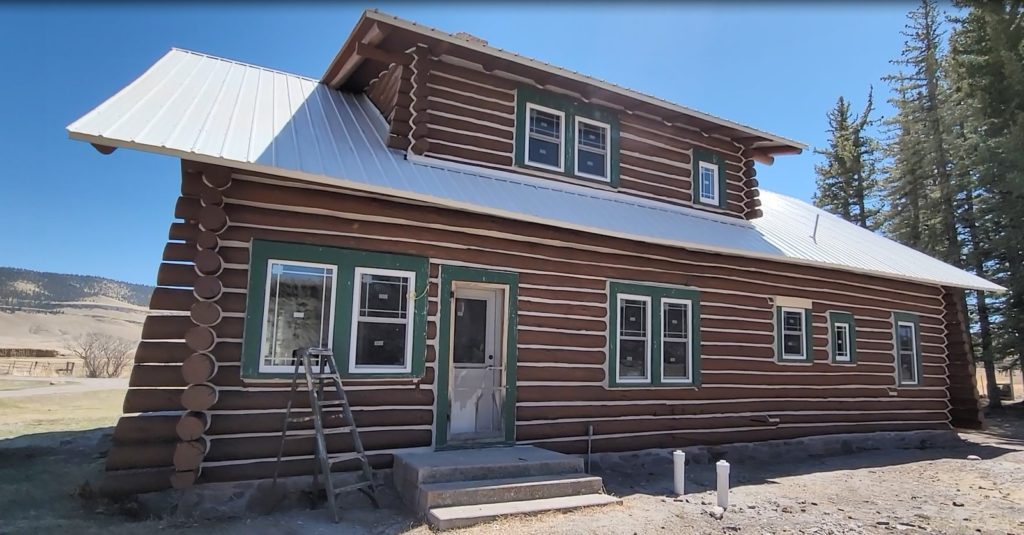
The backside of the cabin is after a complete restoration. The client further improved the appearance by installing new windows and doors.
A Historic Restoration Journey
Step 1: Prepping the Log Home for Restoration
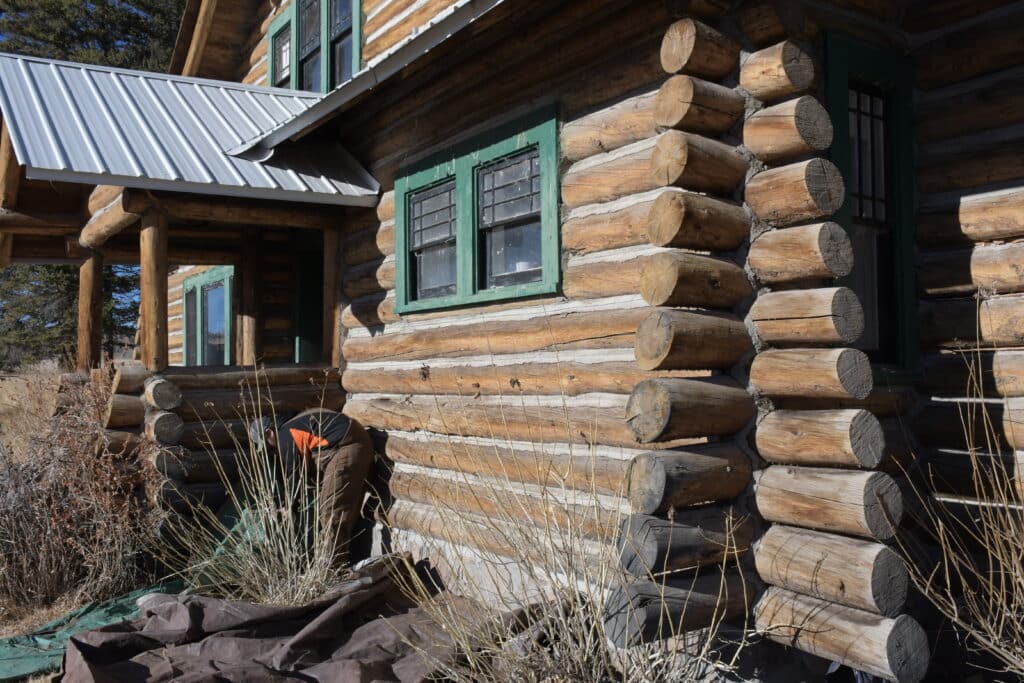
While our Log Masters are prepping the home, the project manager rediscusses the restoration process, sets daily expectations with the client, and answers any questions they may have. During prepping, we ensure areas such as windows, fascia, etc., are masked off with Ramboard and plastic to protect them during media blasting services and tarp off near the house’s base to catch media debris. For this project, we removed landscaping that would obstruct work. This often means removing bushes near the cabin. Besides, despite its aesthetic appeal, it damages the log’s base structure. So, having your landscaping shrubbery closer than two feet from the home is never a good idea. Having them beyond two feet allows proper ventilation on the log surface after wet days.
Step 2: Media Blasting the Log Cabin
While some companies still use corn cob or soda, Log Masters Restorations uses recycled glass bead media to remove debris and stains and reveal the log surface. To media blast, we use compressors, which are often loud, and the service itself is dusty, especially on a windy day. Restoring a cabin of this age and history presented unique challenges and rewards. The first step was media blasting the old, discolored, and aged logs. This removed surface grime and prepared the wood for further restoration.
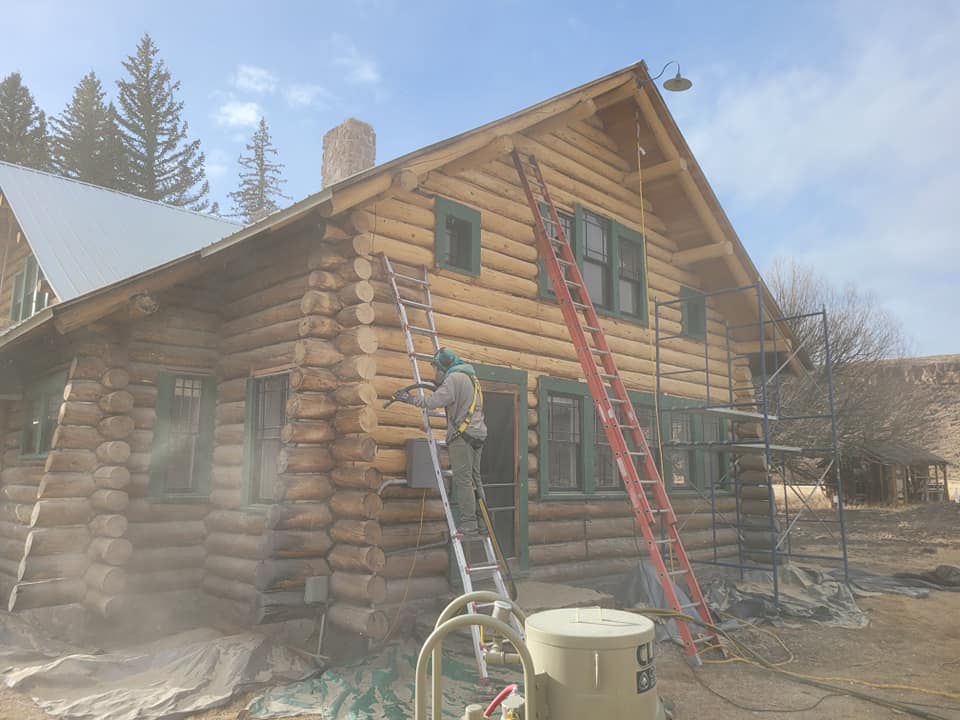
Media blasting in Progress. We use proper safety gear for our employees to ensure they work safely around your home.
Step 3: Remove Failing Chinking
Next came the labor-intensive task of removing the original wire and cement chinking, secured with countless nails. This process is often highly labor intensive, going chink line by chink line around the cabin. It took five people a week or more of handwork with hammers and chisels, followed by sanding to repair areas damaged by the old mortar and nails.
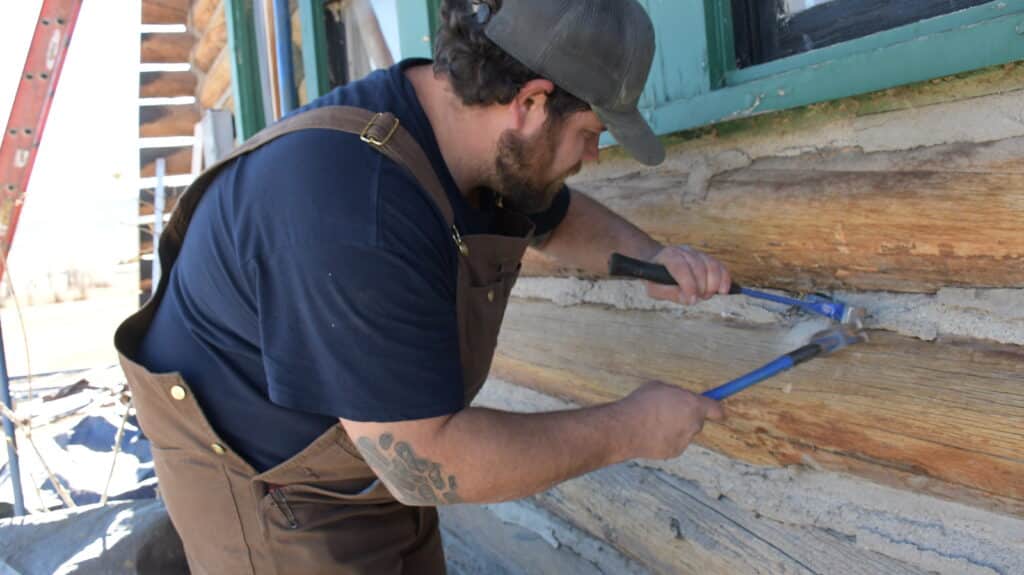
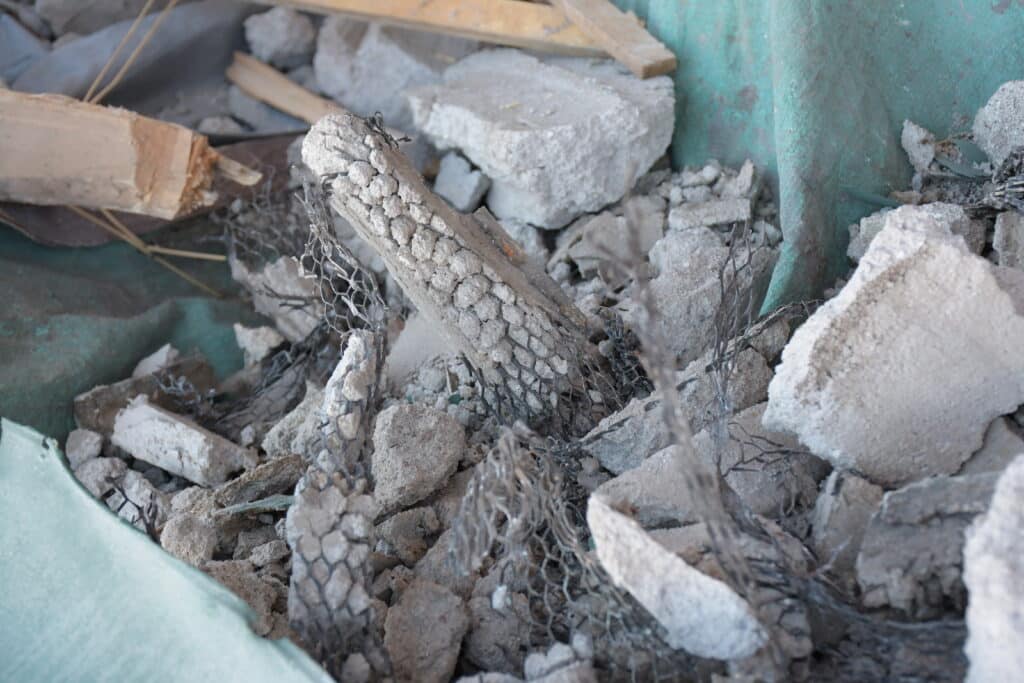
Although this chinking was cracked and allowed air to intrude into the cabin, it was very well secured to the cabin. Removing it, inch by inch [since every nail holding it to the cabin was about two inches apart] was no easy task. Talk about a workout for the biceps and forearms.
Step 4: Borate and Protect for Winter Pause
Sometimes, a restoration can lead to unfavorable weather conditions without warning. Since stain and chinking must be applied during temperatures between 40 and 90 degrees for best adhesion, a restoration may be paused, like this project. After prepping the logs, we used a borate treatment to protect against wood-destroying insects and rot. With winter approaching, we covered the entire cabin in 4-mil heavy plastic sheeting to protect it from the elements while the restoration paused.
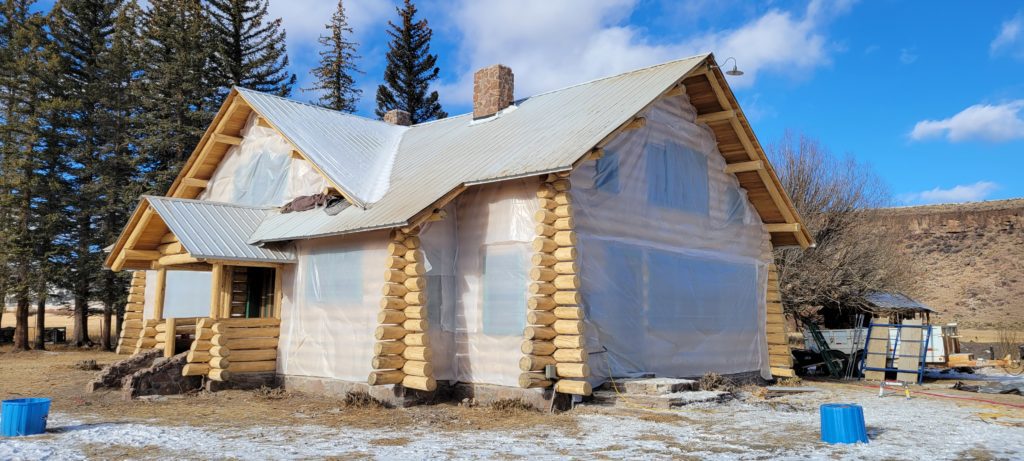
Step 5: Return in Spring to Prelude, Stain, and Clear Coat
In early Spring, we returned to start staining once the weather conditions were more consistent and predictable.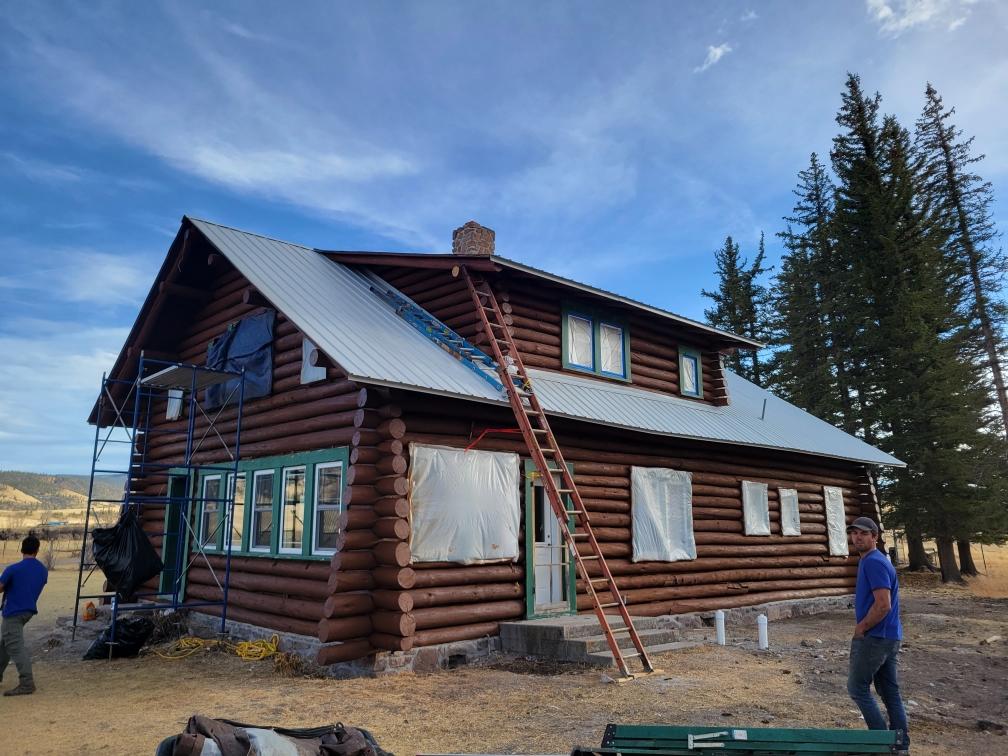
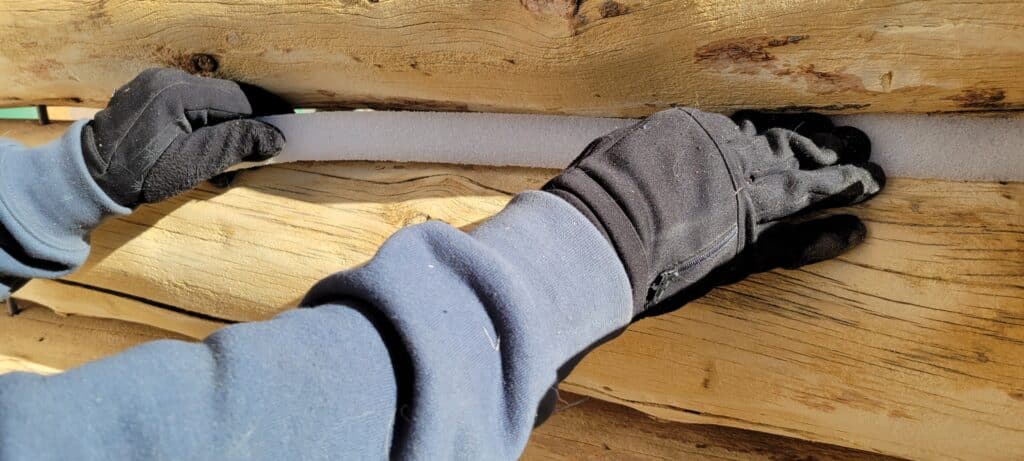
Step 6: Grip Strip Installed to Prep for Chinking
While one set of Log Masters began staining, the rest started installing the grip strip between the logs in preparation for chinking.
Step 7: Chinking the Entire Cabin
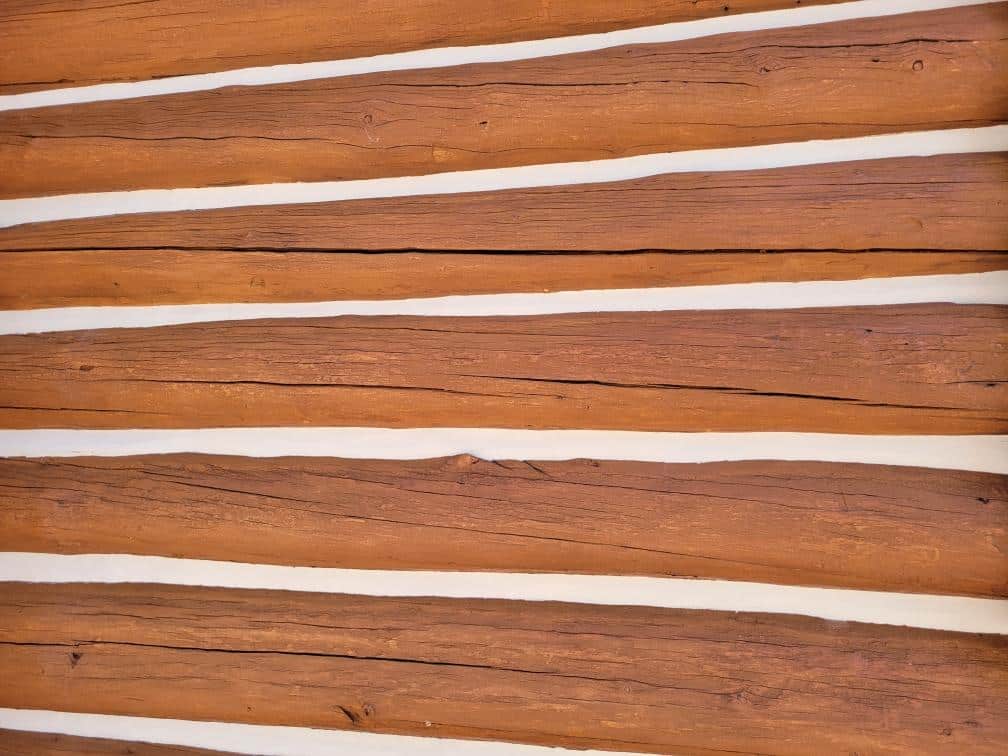
This can take a while, as we want the chink lines to look clean and smooth without leaving residue marks on the logs. Flat, precise lines require time, attention to detail, and skilled hands. Can you guess how long it takes to do 10 feet of chink, much less multiple lines on a whole cabin? Many hours.
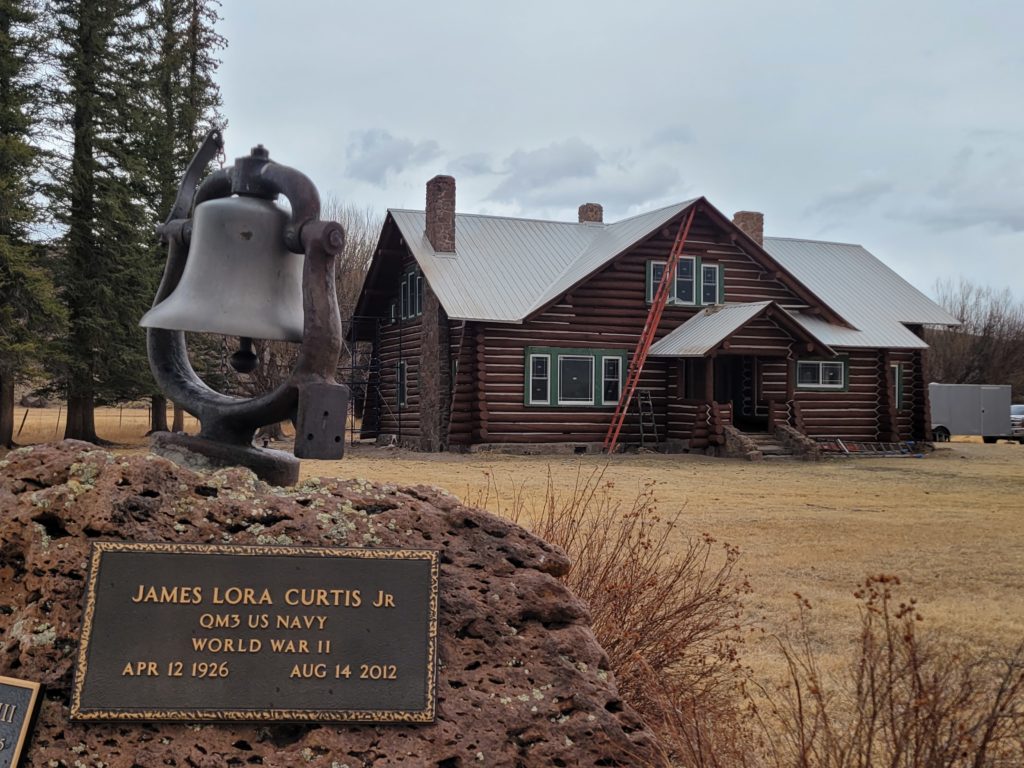
While finishing the chinking on the front of the cabin, I had to include a picture of the historic bell and plaque rock on the property.
Step 8: Check Customer Satisfaction with the Completed Work | Finishing with Excellence
At Log Masters Restorations, completing a contract isn’t just about finishing the work—it’s about ensuring our clients are thrilled with the results. Once all restoration tasks were completed on this historic cabin, we conducted a thorough review with the owners to confirm their satisfaction. As a company proud of our 5-star reputation, we strive to exceed expectations with every project.
After meticulously cleaning up the site, the moment we cherish most arrived: seeing the joy and even tears in our client’s eyes as they took in their beautifully restored cabin. Leaving behind a smiling family and a revitalized home, we loaded up, knowing we had preserved a structure and a cherished family legacy.
Modern Solutions for Timeless Durability
The project resumed in spring with the application of Perma-Chink Log & Timber Defense Saddle Brown stain, applied in two coats and back brushed into the thin grain wood fibers for enhanced protection and beauty. A grip strip was inserted between the logs before we applied Sashco Log Jam synthetic chinking in Mortar White color, which flexes with temperature fluctuations. This modern chinking ensures that the cabin can expand and contract with the seasons without losing adhesion or integrity, a crucial feature for the variable climate of the San Luis Valley.
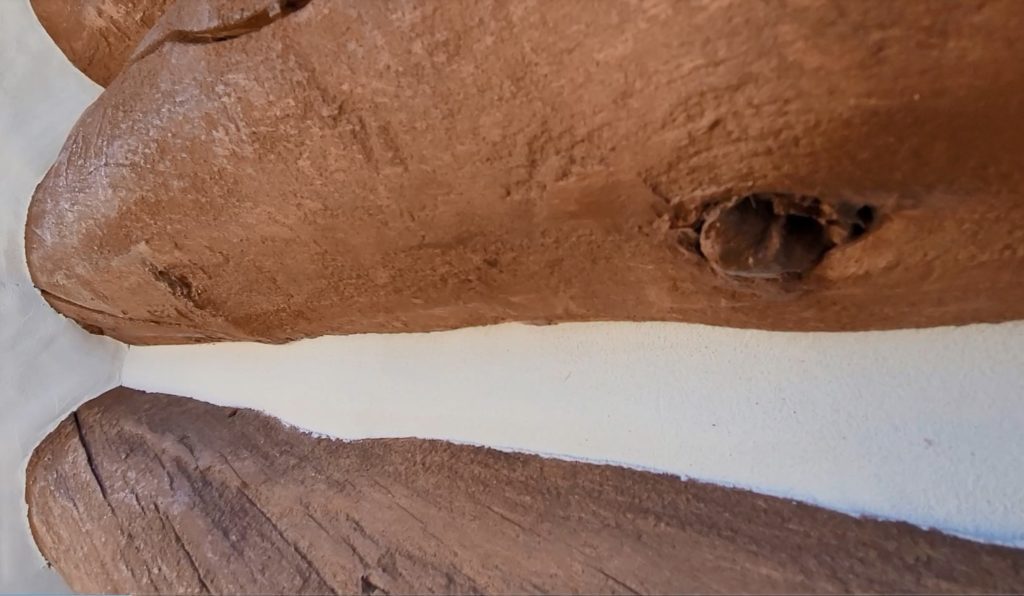
Log Jam Mortar White by Sashco | Modern Style Smooth Chink Lines
While we didn’t install the windows or doors, the combination of media blasting, synthetic chinking, and advanced staining methods transformed the cabin into a resilient and visually stunning retreat.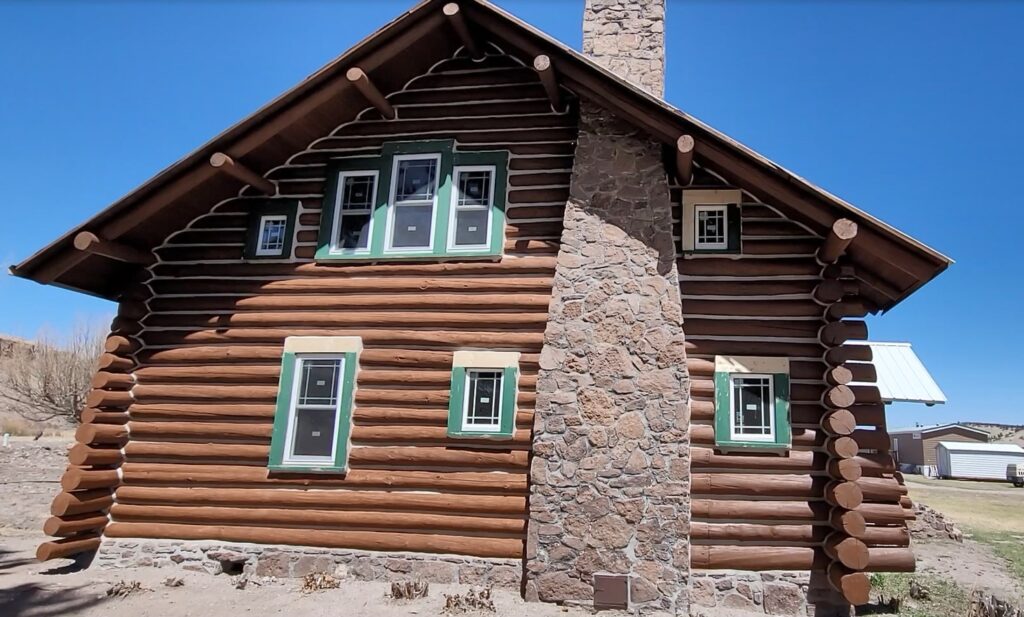
A Testament to Expert Craftsmanship
This cabin’s survival through decades of abandonment is a testament to the expert craftsmanship of its original builders. The sturdy construction, thoughtful design, and Colorado’s dry climate ensured the structure remained intact. Our restoration work, featuring modern materials and techniques, ensures this cabin will stand for another 500 years, God willing.
A Legacy Passed Down
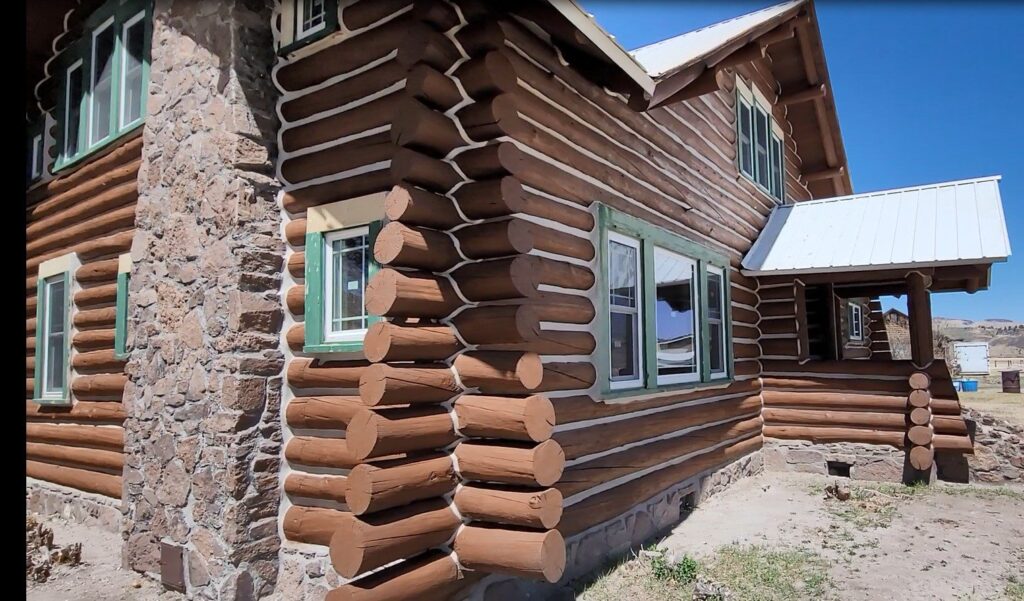
This cabin is more than just a structure—it’s a family legacy. Built-in 1900, the land has been home to the original owners for generations. Now, the cabin houses their children’s family, continuing a tradition of love, resilience, and connection to the land. The restoration ensures that this two-story beauty remains a cherished part of their family’s story for decades.
A Log Cabin Revival
Reviving a cabin with such a rich history and significance was an honor. From the intricate removal of its original mortar chinking to the application of state-of-the-art stains and chinking, every step was taken with care and reverence for the past. This project exemplifies how modern restoration techniques can preserve and enhance historic log homes for future generations.
Ready to Restore Your Log Home?
Whether restoring a historic cabin or maintaining a modern retreat, Log Masters Restorations is here to help. Contact us today for a free estimate and learn how our expertise can bring your log home back to life.
