Some log-home maintenance tasks are manageable for a prepared homeowner. More extensive restoration may require specialized equipment, product knowledge, and professional repair planning.
The right choice depends on the home’s condition, project scope, access, your experience, and available time. Compare materials, equipment, preparation, and potential corrective work—not just labor savings.
This guide explains what restoration involves, what to include in a DIY budget, and when professional help is appropriate.
What Makes Log Home Restoration Different?
Log-home restoration must account for wood condition, moisture exposure, movement, and compatibility between finishes and sealants.
A successful project starts with understanding the existing materials and identifying needed repairs. Applying a new finish does not fix underlying decay or an ongoing leak.
Homeowners can learn appropriate maintenance methods. Deciding whether to hire help should reflect the work involved, access requirements, and the consequences of an unsuitable repair.
What Log Home Restoration Actually Involves
Restoration may include finish removal, wood repairs, sealing, staining, and protective topcoats where specified. Routine maintenance may need a smaller scope.
The preparation method and sequence depend on the existing finish, wood condition, repair needs, and selected product system. Establish those requirements before you buy materials or start work.
Surface Preparation: Cleaning, Stripping, and Media Blasting
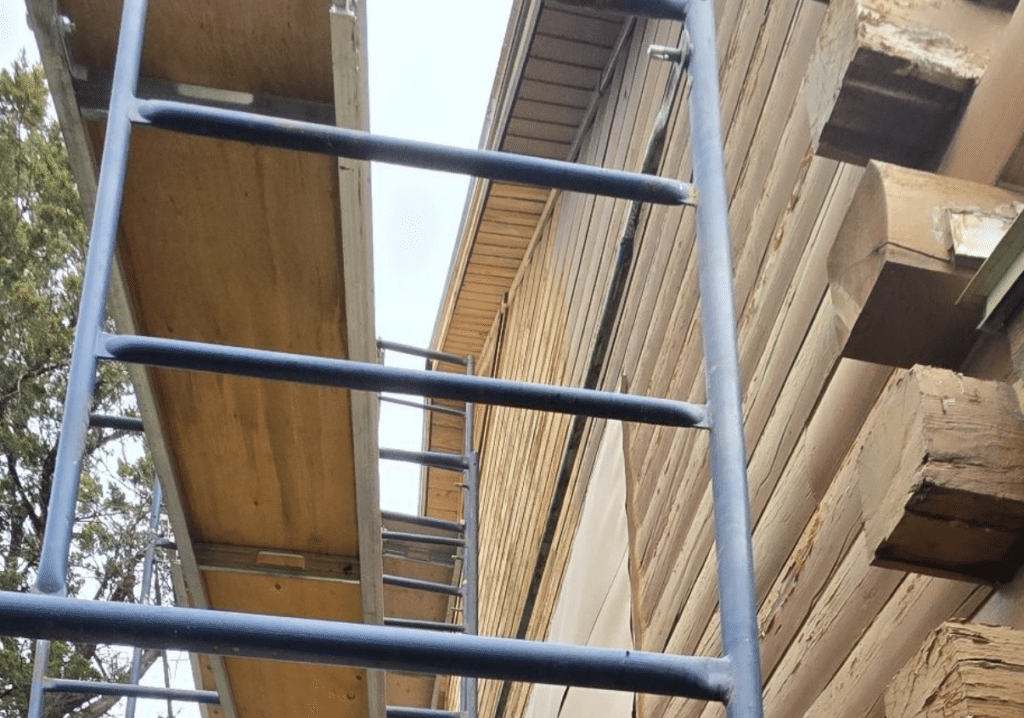
Surface preparation depends on the existing finish, wood condition, and products selected for the project. A sound, compatible finish may need cleaning and maintenance rather than complete removal. Failed or incompatible coatings may require stripping, media blasting, sanding, or a combination of methods.
Use cleaners and preparation methods approved for the selected finish system. Washing technique, equipment settings, rinsing, and drying all affect the result. Excessive pressure or aggressive preparation can damage wood and surrounding materials.
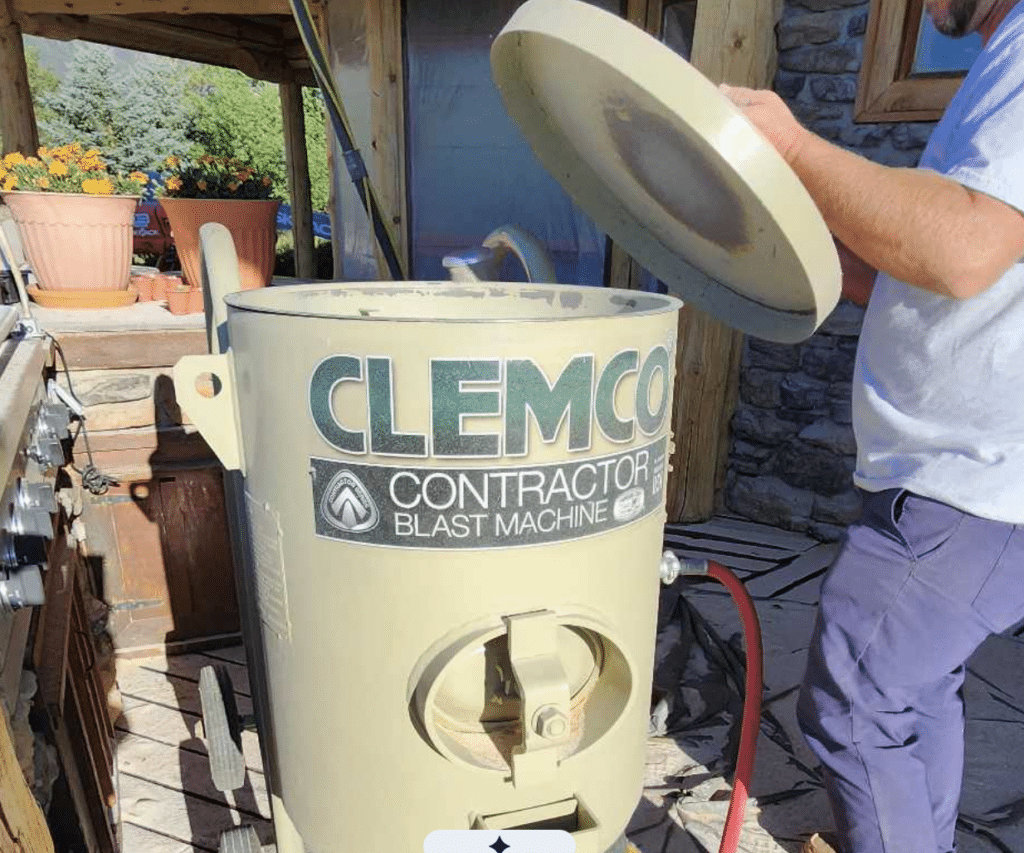
Media blasting and chemical stripping require appropriate equipment, protective measures, and knowledge of the substrate. Before you start, plan how you’ll protect nearby surfaces and prepare the wood for the next step.
Rot Repair and Log Replacement
Log deterioration should be evaluated before a new finish is applied. A small visible defect can extend deeper into the wood, and some damage becomes clear only during preparation or when removing deteriorated material.
The appropriate approach may involve a localized repair, partial replacement, or full replacement. The decision depends on the amount of remaining sound wood, connections, structural demands, and the extent of deterioration. Filling a cavity does not automatically restore a log’s load-bearing capacity.
Have a professional evaluate suspected structural damage before cutting or removing wood. The repair plan should also address the moisture conditions that caused the problem.
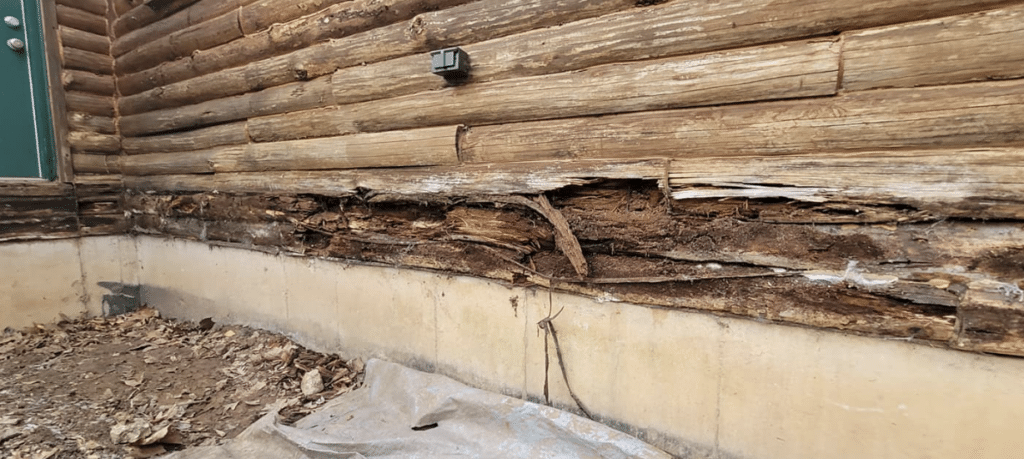
Our guide to log repair versus full log replacement explains how professionals evaluate these options and develop the repair scope.
Chinking, Caulking, and Sealing
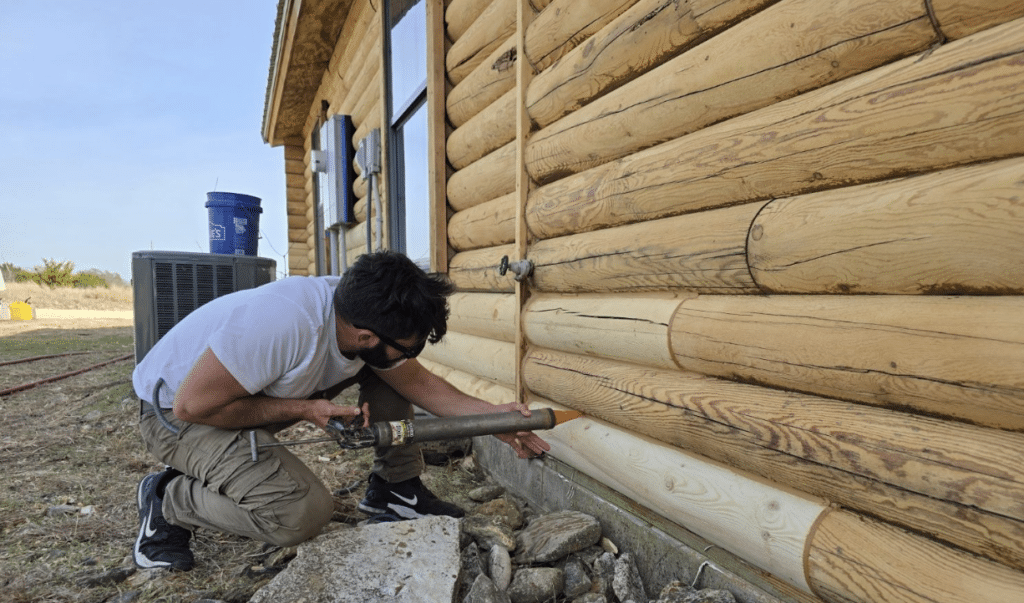
Chinking and caulking help limit water and air intrusion at joints and openings. Check for tears, gaps, and material pulling away from the wood. These conditions need evaluation, but they do not automatically mean concealed damage is present.
Successful application depends on compatible surfaces, proper preparation, suitable backer materials, and the joint dimensions specified by the manufacturer. Backing helps establish two-point adhesion so the sealant can accommodate movement.
Avoid smearing sealant over large areas of log faces or using it to cover deteriorated wood as a substitute for repair. Establish the cause of a failed joint and follow the product’s application and curing instructions.
Staining and Finishing
A suitable exterior finish helps protect logs from weathering. Product selection should account for the existing coating, wood condition, exposure, and the manufacturer’s compatibility requirements.
Follow the selected system’s instructions for surface preparation, wood moisture, application conditions, coverage, number of coats, and drying or curing time. Apply a test area before committing to the full project.
Clear-topcoat requirements depend on the specific product system—not simply whether a stain is water-based or oil-based. Include any specified topcoat in both the application plan and future maintenance budget.
A new finish does not correct decayed wood, failed joints, or continuing leaks. Address those concerns as part of the project rather than covering them with additional coating.
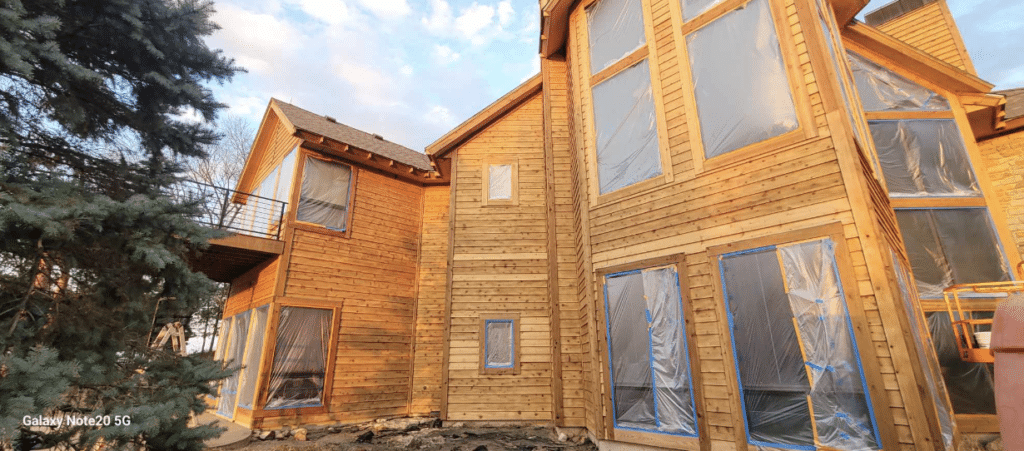
What DIY Log Home Restoration Realistically Costs
Tools and Equipment You’ll Need to Buy or Rent
Build your equipment list around the actual scope. Routine maintenance cleaning may require an approved cleaner, an application sprayer or brush, and a garden hose. A commercial pressure washer is not automatically necessary.
Finish removal or extensive preparation may require specialized washing, sanding, stripping, or blasting equipment. Include suitable protective equipment, masking, containment, and cleanup supplies. Equipment selection and technique must suit the wood, existing coating, and surrounding materials.
Access can be a significant expense. Depending on the height, terrain, and work involved, the project may require scaffolding or a lift, along with appropriate training and protective measures.
Ask rental suppliers about delivery, collection, operating requirements, and minimum rental periods. Include setup time and potential weather delays when comparing DIY costs with a professional proposal.
Log Home Maintenance Products: What to Budget For
Log Masters Restorations regularly uses and trusts Perma-Chink Systems and Sashco products. Other brands are available, but we rely on these two manufacturers for log-home finishing and maintenance. Product selection still depends on the existing coating, wood condition, exposure, and sealant compatibility.
The following October 2026 examples show published prices for two exterior stain-and-topcoat systems:
| Material | Perma-Chink Systems | Sashco |
|---|---|---|
| Exterior stain, five gallons | Lifeline Ultra-2: approximately $510 | Capture: approximately $460 |
| Clear topcoat, five gallons | Lifeline Advance: approximately $460 | Cascade: approximately $460 |
| Pricing basis | Manufacturer’s online store prices | Manufacturer’s suggested retail prices |
These are package-price examples, not equal-area project estimates. Coverage rates and application requirements differ. Calculate quantities from the exterior surfaces being treated, log profile, wood condition, and specified coats—not the home’s interior floor area.
Compare ongoing costs with the initial purchase. Cleaning, maintenance coats, equipment, access, and labor all contribute to ownership costs. A lower-priced coating may become more expensive if maintaining it requires more frequent work.
Maintenance does not always mean applying more stain. Depending on the system and its condition, the appropriate work may be cleaning, renewing the compatible clear topcoat, or addressing selected areas. Follow the manufacturer’s instructions and assess the finish regularly rather than relying on a universal recoating interval.
Before changing products, identify the existing finish and confirm compatibility. An unsuitable combination may require extra preparation or removal, increasing project costs.
Budget separately for cleaners, finish removers, wood treatments, chinking, caulking, repairs, and application supplies. Prices can change; confirm current supplier pricing, shipping, and taxes. These examples are material prices, not an LMR project quote.
Time Investment: Hours Per Stage of the Project
A realistic DIY schedule includes research, ordering, delivery, site protection, equipment setup, preparation, repairs, application, and cleanup.
Separate hands-on working time from drying, curing, and weather delays. Follow the selected products’ requirements between steps; a surface that feels dry may not yet meet the conditions for the next application.
Project duration depends on the surfaces involved, existing finish, repair needs, access, available helpers, and experience. Working only on weekends can also extend equipment rentals and leave prepared surfaces exposed between work sessions.
Before starting, decide how you will protect unfinished areas and handle unexpected damage or unsuitable weather. Compare the full time commitment with the schedule and scope a professional offers.
What Professional Log Home Restoration Costs and What You Get for It
Professional restoration pricing reflects the work required for the individual home. Exterior surface area, coating condition, wood repairs, sealing needs, access, site protection, travel, and finish selection all affect the estimate.
A professional proposal should explain which services and materials are included. Depending on the project, these may include preparation, wood treatment, log repairs, chinking or caulking, staining, specified topcoats, and cleanup.
Ask about exclusions, concealed damage, change-order procedures, and any written workmanship or product warranties. Confirm who manages the project and how they’ll address concerns.
When comparing professional pricing with DIY, include the same scope on both sides: materials, equipment, access, preparation, repairs, your time, and potential corrective work. A useful comparison considers the complete project and its maintenance requirements.
For project pricing examples and a closer look at preparation, repairs, access, and other cost factors, read our guide to how much log cabin restoration really costs.
The True Cost of DIY Mistakes: Where Things Go Wrong
DIY work can succeed with suitable preparation, products, skills, and equipment. When something goes wrong, the additional cost depends on what must be corrected. Some problems allow a localized repair; others require removing the coating, doing extra prep, or replacing wood. The following examples explain where avoidable costs can arise.
Improper Surface Prep Leading to Premature Finish Failure
A finish needs a properly prepared, compatible surface. Dirt, loose wood fibers, failed coatings, unsuitable moisture conditions, or residues can interfere with adhesion and performance.
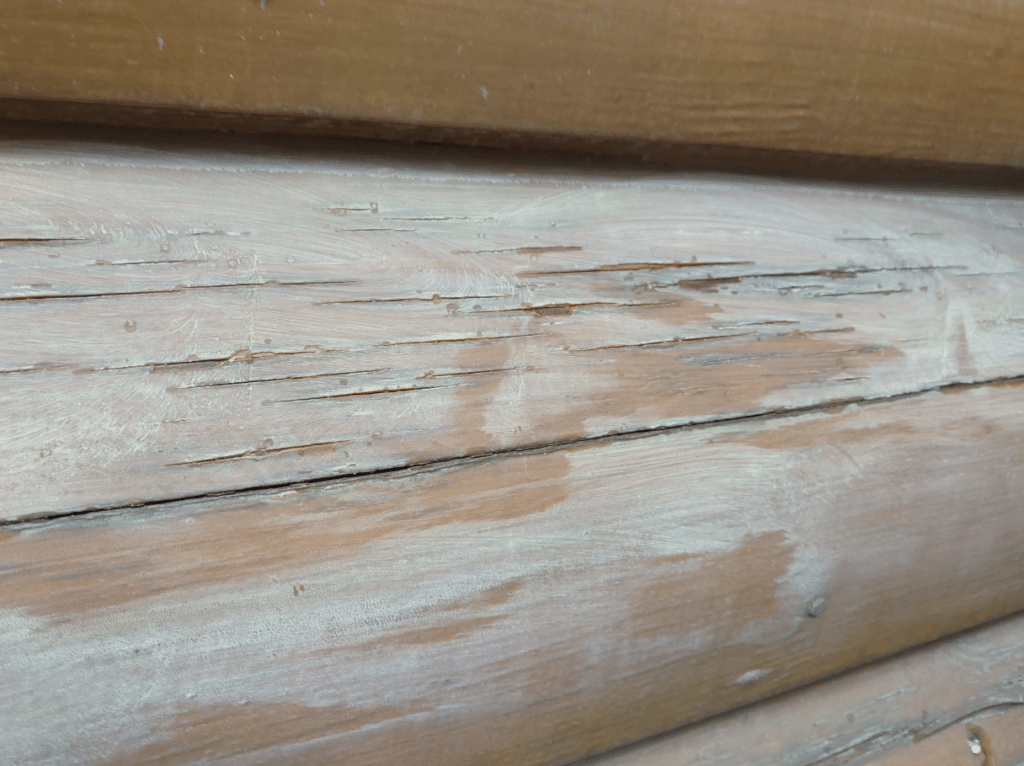
Preparation does not always require removing every existing coating. A sound, compatible finish may accept a maintenance application after the manufacturer’s specified cleaning and preparation. Failed or incompatible finishes may need more extensive removal.
If a coating fails, determine why before applying more product. Depending on the cause and extent, correction may involve a localized repair, additional preparation, or broader finish removal. The amount of corrective work affects the final cost.
Missing Rot or Structural Damage During Assessment
Visible deterioration does not always reveal the full extent of damage. Soft wood, unusual staining, damaged connections, and recurring moisture deserve evaluation before a new finish covers them.
For restoration planning, Log Masters Restorations considers accessible conditions such as:
- Visible signs of movement, settling, or structural concerns.
- Surface discoloration and water staining.
- Soft spots and deteriorated wood.
- Elevated moisture readings where accessible testing is appropriate.
- Stain and finish failures.
- Anticipated maintenance needs.
- Shade, sunlight, UV exposure, and airflow that affect weathering and drying.
- Whether the exterior is full-log construction, log siding, or a combination.
- Water management around roofs, gutters, windows, doors, decks, and the foundation.
- Evidence of unsuitable preparation or application of stain, caulking, or chinking.
- Visible fungal or organic growth.
- Design or construction details that may contribute to moisture problems or complicate maintenance.
- Signs of pest activity and associated damage.
- Available maintenance history, product information, and repair records.
- Log profile, wood species when known, and their implications for restoration.
Photos and accessible testing have limits. Concealed conditions may require further investigation, and concerns about load-bearing capacity may need a qualified engineer’s assessment.
Our restoration evaluation helps define anticipated work and maintenance needs. It does not replace an independent buyer inspection or establish that every concealed area is free of damage.
Wrong Products, Wrong Application, Wrong Sequence
Product compatibility matters when cleaning, sealing, staining, or maintaining a log home. Identify the existing finish and follow the selected manufacturer’s requirements before applying another product over it.
Confirm which cleaners, treatments, sealants, stains, and topcoats are suitable together. Application sequence, surface preparation, temperature, moisture, and drying requirements depend on the specific system.
A product that works on another home may not suit yours. When the existing coating is unknown or you are considering changing systems, contact the manufacturer for guidance and test the proposed application.
Review the applicable warranty terms and retain product and application records. Do not assume that mixing products is approved or that every product combination receives the same warranty coverage.
How Re-doing Failed DIY Work Inflates the Final Bill
Correcting unsuccessful work can add steps not included in the original project. These may include removing an unsuitable coating, cleaning sealant from log faces, repairing damaged wood surfaces, or addressing deterioration that was covered rather than repaired.
The additional expense depends on the problem’s condition and extent. Some areas can be corrected locally; others require broader preparation and refinishing.
If something appears wrong during a DIY project, pause and seek guidance before repeating the method across the remaining walls. Photos, product names, application dates, and preparation details can help a manufacturer or restoration professional recommend the next step.
Tasks You Can Realistically DIY vs. Tasks That Need a Pro
Suitable DIY work depends on your skills, physical capabilities, access, equipment, and understanding of the product system.
Homeowners may handle routine cleaning of safely accessible surfaces, clearing debris, documenting changes, and selected maintenance applications after reviewing manufacturer instructions. Small sealant repairs also require correct preparation, backing, joint design, and compatible materials.
More extensive work deserves additional planning. Finish removal, large sealing projects, and full exterior staining can involve demanding preparation, specialized equipment, and difficult access. Manufacturer training can help you assess whether you are prepared for the work.
Professionals should evaluate suspected structural damage, load-bearing log replacement, significant movement, or uncertain connections. Choose help based on the project’s actual demands and your ability to complete each stage properly.
How to Vet and Hire a Professional Log Home Restoration Crew
Look for a contractor who can explain the proposed work, the materials selected, and why the approach suits your home.
Ask about:
- Experience with log homes and projects similar to yours.
- References and examples of completed restoration work.
- Relevant manufacturer training and familiarity with the proposed products.
- How you evaluate accessible damage and handle concealed conditions.
- Preparation methods and protection of windows, landscaping, and adjacent surfaces.
- Appropriate insurance coverage and any applicable licensing requirements.
- Who manages the project and supervises employees or subcontractors.
- A written scope identifying products, preparation, repairs, finishing, and exclusions.
- Scheduling, payment terms, written change orders, and cleanup.
- Applicable warranties and recommended post-completion maintenance.
Manufacturer training is useful, but consider it alongside demonstrated experience, references, and a clear written proposal. Discuss structural concerns and whether you need engineering assistance before work begins.
Making the Call: DIY or Professional?
The right choice depends on your home’s condition, the work required, and your ability to complete it safely. Routine maintenance and selected repairs may suit a homeowner with the right skills, access, tools, and product guidance. Extensive finish removal, difficult access, or deteriorated logs can call for professional help.
Compare the complete project cost, including preparation, equipment rentals, materials, your time, and any corrective work. Also consider how the proposed finish system will fit your home’s existing products and future maintenance needs.
Founded in 2016, Log Masters Restorations helps homeowners plan log home restoration and maintenance based on their home’s accessible conditions. Our restoration evaluations help identify anticipated work and estimate costs. They do not replace an independent home inspection or an engineering assessment when one is needed.
If you are unsure where to begin, request a free online estimate. Photos, approximate measurements, and any available maintenance or product history can help us understand your project and discuss the next steps.